All Overwatch 2 Characters And Abilities Detailed
Unlike the first FPS game where all heroes were available to all players, you now have to unlock future Overwatch 2 heroes from the game’s seasonal battle pass. The new characters are featured on the free track, but you need to reach rank 55 in the free PC game to unlock them. New Overwatch 2 heroes typically arrive every other season.
Here are all of the Overwatch 2 characters:
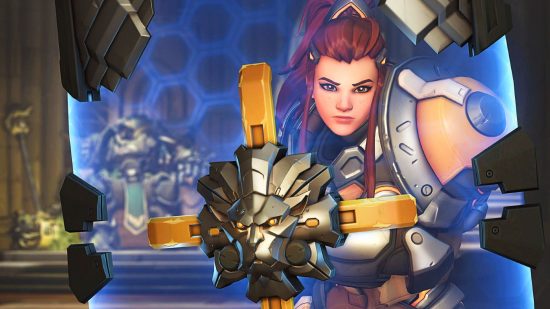
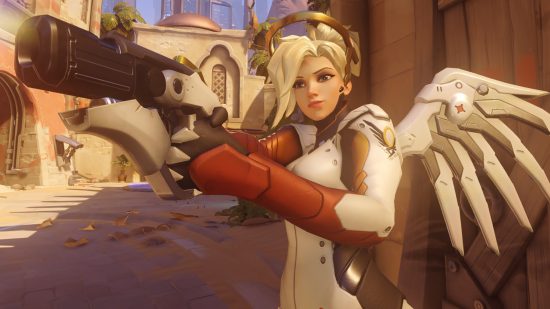
Ana
Overwatch 2’s resident harmacist, Ana is a sharpshooting support who, in the right hands, can completely dictate the flow of the game. Ana’s Biotic grenade applies anti-heal, making tanks considerably easier to get through. Meanwhile, her Nano Boost is traditionally used as a big ‘GO’ button, providing a huge stat boost to her target.
Role: Support Biotic rifle A sniper rifle with shots that heal teammates and damage enemies. You can scope in by holding the right mouse button. Sleep Dart Fires a dart that stuns the enemy for a few seconds. Biotic Grenade A throwable grenade that heals teammates and increases how much healing they can receive while applying the opposite effect on enemies caught in its area of effect. Nano Boost Supercharges an ally so they deal more damage and take less damage.
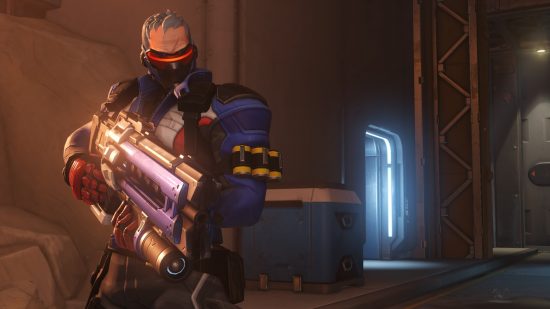
Ashe
If you need a little more ‘yeehaw’ in your life, meet Ashe. This crack shot of a DPS can chain big hits from her rifle with the odd stick of dynamite here and there with explosive efficiency. When all else fails, throw in B.O.B. to shake up the fight. B.O.B., DO SOMETHING.
Role: DPS The Viper A semi-auto rifle that can deliver power shots when scoping in. Coach Gun A quick-fire, sawn-off shotgun blast that deals lots of damage and knocks Ashe back. Dynamite A throwable explosive with a short delay. It can be shot for faster detonation. B.O.B. A robot that can be spawned into the battlefield. He sprints forward knocking enemies into the sky and then shoots them with his wrist-mounted guns.
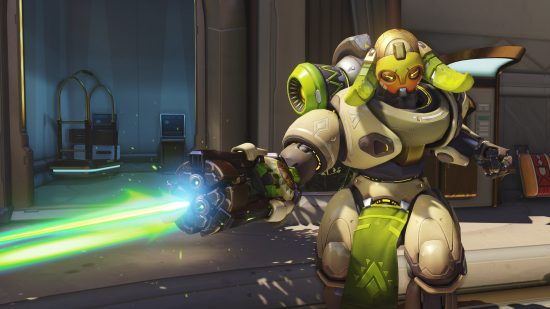
Baptiste
Combat medic Baptiste is the ideal squadmate to have your back out in the field, combining healing and shielding tools to keep you safe. His ultimate, Amplification Matrix, is especially juicy when combo’d with projectile-based heroes, doubling the damage of anything that passes through it.
Role: Support Biotic Launcher The primary weapon is a burst-fire assault rifle that deals moderate damage, alt-fire is a healing grenade launcher. Regenerative Burst Heals yourself and nearby allies for an instant burst of health, followed by a slow heal-over-time effect. The instant heal effect is doubled if the target is below half health. Immortality Field A throwable device that spawns a bubble, shielding any teammates inside from death. The device can be destroyed. Amplification Matrix A shield that’s projected a couple of meters in front of Baptiste, buffing the healing and damaging effects of any ally projectiles that pass through it. Exo Boots A charged leap that can be used to access vantage points. Hold crouch to charge.
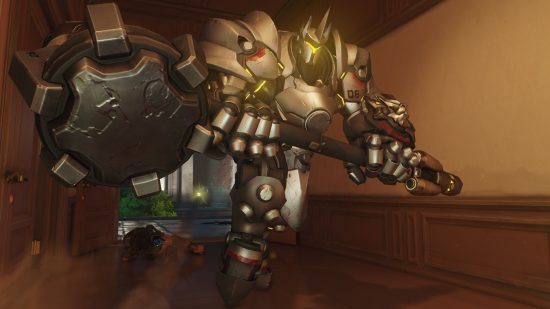
Bastion
Everyone’s favorite happy lil robot of death, Bastion has long been the ideal Overwatch 2 hero for bunkering down points or payloads, turning into a fast-firing mobile turret with the strike of a button. The ultimate glass cannon, only pick Bastion when your team comp is set up to keep you safe.
Role: DPS Configuration: Assault In this setup, Bastion is a slow-moving tank-like hero with a devastating Gatling gun. Configuration: Recon A more agile walker-like stance with an accurate rifle. A-36 Tactical Grenade A ‘nade that can be bounced off walls or explodes on impact with enemies or the floor. Configuration: Artillery A stationary artillery configuration that lets you select three locations to bombard.
Brigitte
Release Brigitte fundamentally changed the trajectory of Overwatch due to how ridiculously overturned she was – particularly because Shield Bash used to stun struck targets. Nowadays, the plucky Swede is in a healthier spot, healing her team based on the damage she deals with her abilities and Rocket Flail, and rallying them with her ultimate to charge into the enemy.
Role: Support Rocket Flail A mace for bashing skulls. Repair Pack Throw it at an ally to heal them for a short spell. Whip Shot Knock an enemy back with an extended flail attack. Barrier Shield Hold the right mouse button to deploy an energy barrier with lots of health. Shield Bash When using the Barrier Shield you can charge forward to damage and knock enemies back. Rally Buffs movement speed and health for all nearby allies. Inspire This is a passive AoE healing effect that’s triggered whenever you deal damage to enemies.
Cassidy
It’s high noon, and Cassidy is on the case. The rootinest, tootinest cowboy in Overwatch 2 makes expert use of his high-powered revolver, athleticism, and magnetic grenade to take down even the meanest foe.
Role: DPS Peacekeeper A high-damage revolver. Combat Roll Get an instant reload and avoid incoming fire with a directional roll. Magnetic Grenade A short-range grenade that magnetizes towards the nearest enemy and explodes, dealing extra damage if it sticks to them first. Deadeye Enter a sharpshooter mode where you lock onto every enemy in sight before unloading a volley of lethal, highly accurate shots.
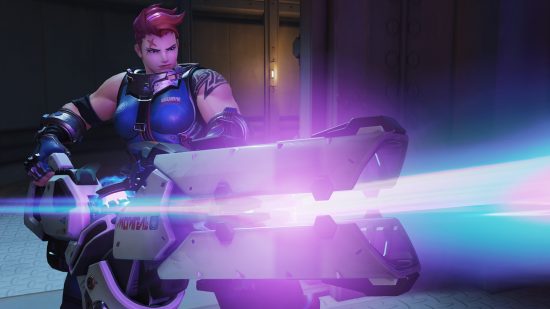
D.Va
Mecha enthusiasts, here’s your perfect Overwatch 2 hero. D.Va is an off-tank that utilizes her mech to dive into backlines, provide anti-projectile support for her team using Defense Matrix, and ultimately kaboom the enemy team by making her robotic counterpart self-destruct. Just be careful when you’re de-meched, as D.Va is incredibly squishy
Role: Tank Fusion Cannons Primary damage dealers, work like full-auto shotguns. Light Gun When out of the mech, D.Va’s primary is an automatic pistol. Boosters Jet through the air in the direction you’re facing. Defense Matrix Block incoming fire. Micro Missiles Fire a small volley of mini rockets. Self-Destruct Eject from the mech as it hurtles forward, exploding after a short delay. Call Mech Survive out of the mech for long enough and you can spawn in a replacement. Eject Ejects from the Mech if it takes too much damage and continues the fight on foot.
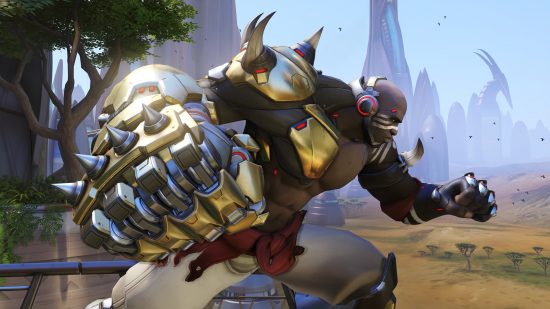
Doomfist
If mulching enemies with a big ol’ Falcon Pawnch is your kinda bag, then Doomfist is your new bestie. This tanky disruptor is not only efficient at clobbering squishies, but he can peel your own high value targets in a flash should they get ganked.
Role: Tank Hand Cannon A short-range primary weapon with a shotgun-like spread. Reloads automatically. Rocket Punch Charge power punch that launches you forward and knocks the target back. Extra damage if you knock an enemy into a wall. Seismic Slam Jump up and then smash back into the ground, dealing AoE damage. Power Block A small energy shield that blocks damage and converts it into charge for your Rocket Punch. Meteor Strike Leap through the air and then aim the reticule to decide where you land, before striking the targeted area and dealing massive damage.
Echo
One of the only worthwhile uses of AI we’ve seen, Echo is a highly dangerous robot who can rapidly adapt to any combat situation. She can fly, she has a cool beam, and she can transform into an enemy hero to provide an extra burst of compositional versatility. So cool. So, so cool.
Role: DPS Tri-Shot Fires three projectiles in a triangular arrangement. Sticky Bombs A small barrage of sticky bombs detonates after a short fuse. Flight A quick, forward-facing burst of flight followed by a short duration in which you can fly freely. Focusing Beam A beam of very high damage that does even more damage to targets who are low on health. Duplicate Copy a targeted enemy to bolster your ranks. Stops the enemy from switching Overwatch 2 characters until you’re done. Glide Instead of jumping and falling, Echo and glide after jumping.
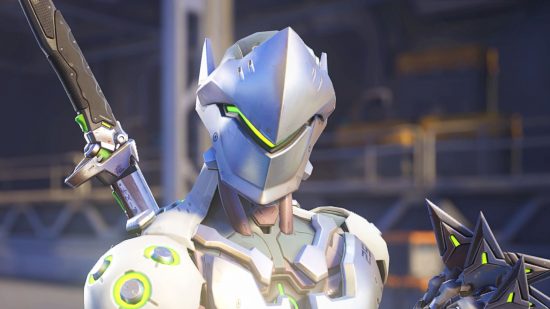
Genji
If farming Tiktok clips is your forte, then you’ll love Genji. This ridiculously mobile, high-skill ceiling hero blends parkour with precise strikes to devastate backlines as he darts about the map. Unleash his Dragonblade for big choppy action.
Role: DPS Shuriken A precise burst of three shurikens with your left mouse button, or an arced horizontal throw if you use the right mouse button. Deflect Send incoming projectiles back at the enemy, blocking melee and projectile damage too. Swift Strike A fast dash attack in which you strike an enemy with your sword. Any elimination you get as Genji resets this dash. Dragonblade Buffs Genji’s sword attack so you deal more damage, can dash further, and strike more often. Cyber-Agility Wall-climb and double-jump.
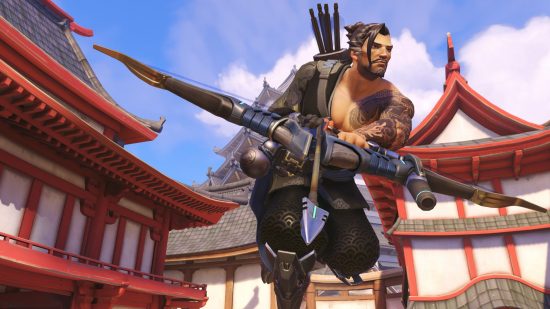
Hanzo
Overwatch 2’s ranger character, Hanzo makes liberal use of different arrow types to provide info to his team and amp up his damage. Hanzo can be a beast in the hands of certified aimers, but if you’re having an off day then let his Dragonstrike take care of business for you.
Role: DPS Storm Bow A bow and arrow. Can be charged for a more damaging shot. Storm Arrows A volley of five arrows that deal less damage. Sonic Arrow Shoot an arrow that detects any nearby enemies for a short duration. Lunge Double-jump. Dragonstrike Fires a Dragon Spirit forward, dealing massive damage to any enemy it passes through. Wall Climb Exactly that. Jump towards a wall and Hanzon will start scrambling up it.
Hazard
While the entirety of Bonnie Glasgow was read for absolute filth by Hazard’s reveal trailer, the Scottish hero is technically right: “The best defense is stabbing.” The mobile tank is a prickly customer, as he can dish out damage with his Bonespur shotgun while creating new terrain to disrupt and isolate targets.
Role: Tank Bonespur: Arm-mounted shotgun that fires a burst of spikes. Spike Guard: Hazard protects himself, firing homing spikes at nearby enemies. Hazard gains damage reduction and regenerates ammo while guarding. Jagged Wall: Hazard launches a spiked wall that knocks back and damages enemies with its radius. Downpour: Rains down spikes, Immobilizing enemies hit. Vault: Hazard can scale short walls and grab ledges. Violent Leap: Lunge forward. Reactivating slashes enemies, knocking them back.
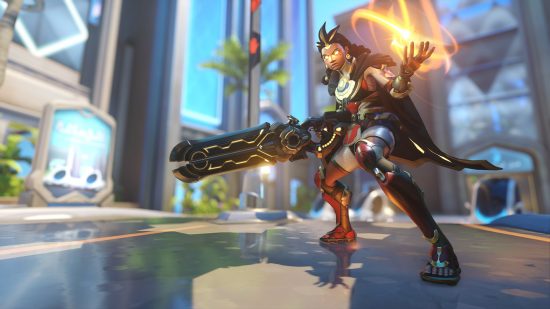
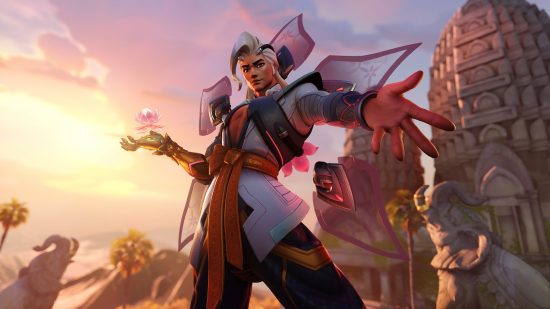
Illari
Illari is a pretty straightforward support. Use her railgun to either attack enemies or heal allies, while utilizing Outburst to reposition or peel away from assailants. Healing Pylon is a pylon that heals (shocking, we know), and Captive Sun deals damage and applies a big ol’ debuff to struck foes.
Role: Support Solar Rifle Fires damaging shots with left click, and a healing beam with the right. Outburst Launches Illari in the direction they are moving, and can also blow enemies back. Healing Pylon Fire an object, a Healing Pylon, which sticks to a surface and provides healing for your team within a certain radius. Lasts until redeployed, or destroyed. Captive Sun Illari launches into the air and fires a ball of energy that deals damage, slows enemies, and marks them. Marked enemies will explode if they take additional damage.
Junker Queen
The second Overwatch 2 hero to be added to the game during the beta, Junker Queen is a one-woman-army who is at her best when facing down multiple enemies at close range. Get in, inflict wounds, heal from wounds inflicted. Easy.
Role: Tank Scattergun Pump-action shotgun for close-range fights. Jagged Blade Throw this knife to deal damage, then use the skill again to pull it back to you, tugging any stuck enemy along with it. Inflicts a wounding effect on enemies, which deals damage over time. Commanding Shout Gain temporary health and movement speed buffs for you and any nearby teammates. Carnage Wound all enemies in front of you. Rampage Charge forward, wounding enemies. This deals damage over time and prevents them from healing. Adrenaline Rush Convert wound damage into self-heals.
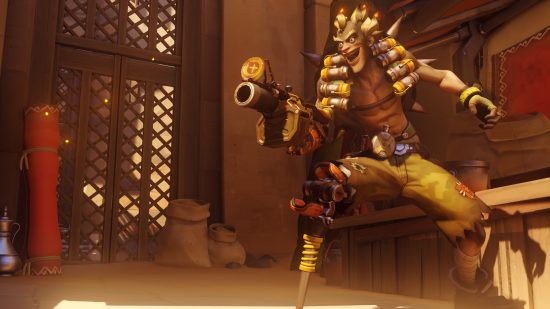
Junkrat
Junkrat is a goofy grenadier whose erratic personality matches his gameplay to perfection. He can use his Concussion Mines to either damage opponents or launch himself into the air, raining down grenades as he repositions. For even bigger, boomier damage, let the Rip-Tire rip into the enemy team.
Role: DPS Frag Launcher Fire bouncing grenades at enemies. Concussion Mine A mine that detonates, knocking enemies back a great distance. Steel Trap A bear trap prevents anyone caught inside it from moving until it breaks. Rip-Tire Turn into a spinning tire of death, drive into the enemy ranks, and detonate for huge damage. Total Mayhem Drop a cluster of bombs upon being eliminated, and take no damage from your explosives.
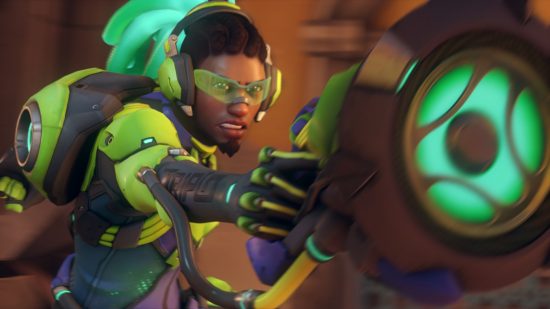
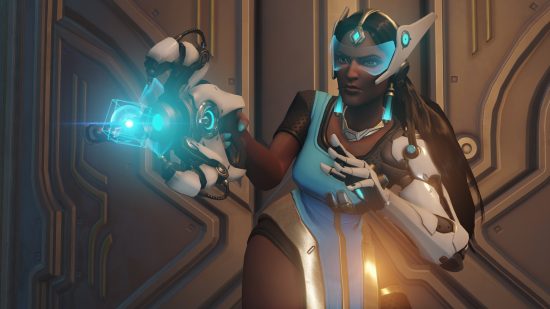
Juno
A favorite among Sabrina Carpenter and Clairo enjoyers, Juno is just as good in-game as she sounds. The Martian’s mobility is no joke, as she makes light work of gravity. Her ultimate, Orbital Ray, can be fight-deciding due to the healing and allied damage amp it provides.
Role: Support Mediblaster: Burst-fire weapon that heals allies and damages enemies. Pulsar Torpedoes: Mediblaster alt-fire. Press secondary fire to lock on, then fire home projectiles that heal allies over time and damage enemies using primary fire. Hyper Ring: Deploys a ring that boosts movement speed for allies passing through. Orbital Ray: Calls down a huge, forward-moving beam, healing allies and increasing their damage. Glide Boost: Glide horizontally with boosted speed. Martian Overboots: Enables double jump. Hold jump while jumping to hover.
Kiriko
Another support with excellent mobility, Kiriko can zip about the battlefield, healing allies with her Ofuda papers and dealing damage to enemies with her kunai as she goes. Kitsune Rush works similarly to Brigitte’s rally in that it buffs movement speed and encourages an onward charge, though it also offers cooldown reduction and attack speed – big.
Role: Support Healing Ofuda Throw healing Ofuda papers out, which can hone in on targeted allies and deliver HP. Kunai Throwing knives that deal extra critical damage. Swift Step Teleport to an ally. Protection Suzu Throw a charm that makes allies temporarily invulnerable and removes most negative effects. Kitsune Rush Sends a spirit fox forward. Any allies who follow in its wake gain huge buffs to movement speed, attack speed, and shortening cooldowns.
Lifeweaver
Lifeweaver can be a thorn in the side of enemy teams thanks to his ability to provide terrain and safety to allies while keeping them topped up on health. One could say he’s the root of any good team comp. The seed from which Ws bloom. Etc. Etc.
Role: Support Healing Blossom Hold down this ability to charge a healing burst. Release the action to heal a targeted ally. Thorn Volley Rapidly fire a spread of thorns. Petal Platform Throw a platform towards friends or foes that is activated when stepped on. Rejuvenating Dash Perform a dash and lightly heal yourself at the same time. Life Grip Pull an ally towards your location while protecting them from crowd control and damage abilities. Tree of Life Place a healing tree that instantly restores the health of nearby allies upon sprouting and continues healing as it stays alive.
Lucio
Lucio is a fan-favorite support who can skate across the OW2 maps in record time, booping opponents off of them and healing allies with his aura as he goes. If freneticism is your game, Lucio is your main.
Role: Support Sonic Amplifier Fire a short-range projectile that deals low damage on impact. Soundwave Alt-fire for the Sonic Amplifier. Shoots a blast of sonic energy that knocks enemies back a considerable distance. Crossfade Choose between an area of effect heal and a speed boost for you and your nearby allies. Amp It Up Buffs the effect of Crossfade. Sound Barrier A temporary shot of extra health for nearby allies. Wall Ride A passive movement ability that allows you to glide around walls at great speeds.
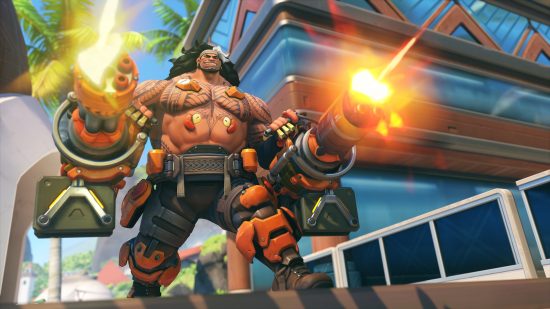
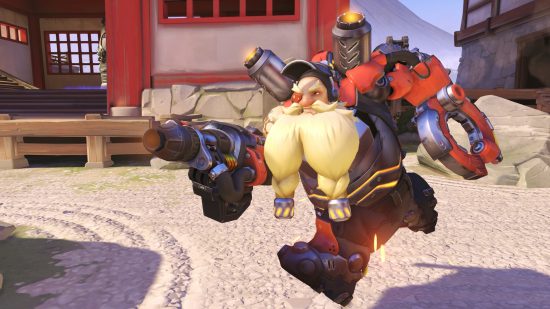
Mauga
Welcome to the gun show, the main act being man-mountain Mauga. Trust us when we say Mauga isn’t trapped in his cage with you, you’re trapped in there with him as he grinds you to a pulp with his not-so-miniguns.
Role: Tank Incendiary Chaingun An automatic weapon that ignites enemies on repeated impacts. Volatile Chaingun An automatic weapon that deals critical damage to burning enemies. Overrun Charge forward and stomp to launch enemies. Mauga is unstoppable while charging. Cardiac Overdrive An aura that reduces the damage nearby allies take, and allows them to heal themselves by dealing damage. Berserker Passive ability that allows Mauga to gain temporary health when dealing critical damage. Cage Fight Deploy a barrier that traps yourself and your enemies. Gain unlimited ammo while inside.
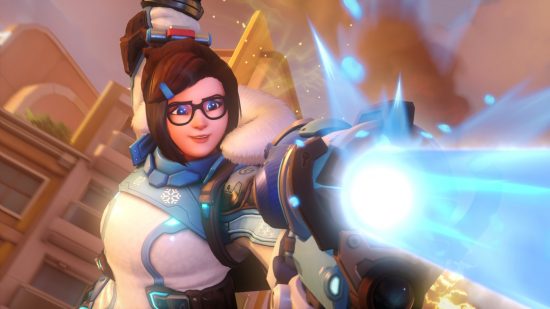
Mei
If you love being an absolute menace, then Mei’s freezing powers are the perfect tool to ruin the mental of anyone you come into contact with. While her Endothermic Blaster doesn’t freeze targets like it did in the original Overwatch, the slow is more than sufficient for dealing the required psyche damage.
Role: DPS Endothermic Blaster Short-range hose of frost damage that slows enemy movement. The alt-fire launches a long-range icicle that deals high damage. Cryo-Freeze Freeze yourself in a block of healing ice, granting invulnerability for as long as the ice block is active. Ice Wall Erect a wall of ice to block enemy movement and line of sight. Each pillar of the ice wall can be destroyed. Blizzard Send out a drone that freezes enemies in a wide area of effect.
Mercy
The angel of life, Mercy was renowned for her team-wide resurrection ultimate and propinquity to Pharah at all times in the original Overwatch. Nowadays she’s still just as useful for healing allies and amping damage, though she can only restore one teammate to life at a time.
Role: Support Caduceus Staff Hold the left mouse button to shoot a healing ray at a targeted ally. Caduceus Blaster A low-damage, full-auto pistol. Guardian Angel Launches mercy towards an ally. While flying towards the ally Mercy can accelerate the leap by jumping, or leap further upwards by crouching. Resurrect Revive a fallen comrade. Angelic Descent Stay high above the battlefield with a very slow descent speed. Valkyrie Full flight control for a short duration, with enhanced abilities.
Moira
Aiming can be really difficult, which is why many players love to lock in Moira, throw out a couple orbs, and beam a few people here and there as she fades around the place. One of the most beginner-friendly Overwatch 2 heroes, give Moira a go if you’re struggling to hit your shots.
Role: Support Biotic Grasp Hold to channel a heal to all allies in front of you. This consumes Moira’s biotic energy resource. The alt-fire turns the channel into a damage-dealing one, which also regenerates your biotic energy. Biotic Orb Shoot a bouncing orb of biotic energy that either heals allies or hurts enemies in its area of effect. Fade Turn invisible, invulnerable, and move faster for a short amount of time to escape. You can’t use other abilities while Fade is active. Coalescence This Ult fires a beam that heals allies and damages enemies.
Orisa
Once a specialist at pulling enemies down the Illios well, Orisa was reworked into a more offensive tank for Overwatch 2. The guardian robot now wields a mighty javelin alongside her minigun, which can be thrown to stun enemies, twirled to protect herself from damage, and slammed down to pull in her foes with tectonic force.
Role: Tank Augmented Fusion Driver An energy-based rotary cannon that overheats if firing for an extended period. Energy Javelin Throw a javelin at an enemy to stun them, deal damage, and knock them back. This deals more damage if you knock them into a wall. Fortify Buffs your health, reduces damage taken, and slows down how quickly your primary weapon overheats for a short duration. Javelin Spin Twirl the javelin around in front of you, destroying projectiles, blocking melee damage, buffing your movement speed, and pushing enemies back. Terra Surge Suck enemies in and trap them in place, before gaining all the buffs of Fortify and unleashing a burst of damage.
Pharah
The other half of the infamous Phar-Mercy combo, Pharah is an airborne terror capable of unleashing justice from above with her arsenal of explosive weaponry. Managing Pharah’s jetpack will separate the good Pharahs from the great ones, so get practicing.
Role: DPS Rocket Launcher Rain long-range rocket projectiles down on your enemies. Jump Jet Fly upwards to gain a good view of the battlefield. Concussive Blast An explosive blast that knocks enemies back around the area of impact. Barrage A huge, continuous volley of mini-rockets. Jet Dash Secondary fire gives Pharah a boost of speed in whichever direction she’s moving.
Ramattra
The leader of the infamous Null Sector, Ramattra has two distinct playstyles, mixing magic and might. While in his Omnic form, Ramattra can fire off Void projectiles and create barriers. However, when he shifts into the tankier, Jojo-esque Nemesis form, he will pummel all in his way with a flurry of blows.
Role: Tank Void Accelerator A projectile-based weapon that fires in a fixed pattern. Void Barrier Creates a barrier at the targeted location. Nemesis Form Equip a different set of attacks and gain additional armor when entering Nemesis Form. Pummel Attack enemies with a punch that pierces through heroes and barriers (exclusive to Nemesis Form). Block Reduce all incoming damage by 75%, also slows your movement speed by 50% (exclusive to Nemesis Form). Ravenous Vortex Fire a nano ball that explodes when it hits the ground, creating a damaging field that not only slows targets but also pulls them downwards. Annihilation Instantly enter Nemesis Form and unleash a swarm of energy that deals 30 damage per second to nearby enemies.
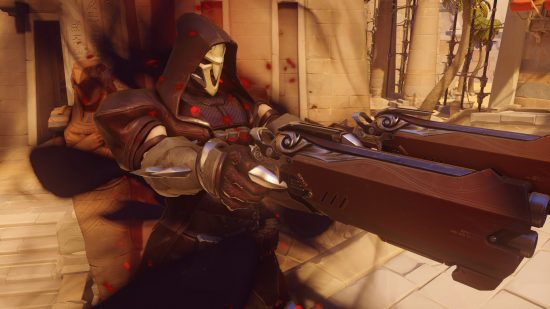
Reaper
The winner of the ‘most likely to watch 2006 Linkin Park YouTube AMVs’ award, Reaper has always been one of the better tankbusters Overwatch 2 offers. Wielding akimbo shotguns, Reaper dishes out the pain, healing himself with each round landed. Utilize his teleport in tandem with his ultimate ability to unleash a deathly dance on unsuspecting foes.
Role: DPS Hellfire Shotguns Short-range primary weapon. Shadow Step Target a location and teleport there. Wraith Form Gain temporary invulnerability and movement speed buffs, cannot shoot while active. Death Blossom Damage all nearby enemies with a spinning barrage of shotgun blasts. The Reaping Damage enemies to heal.
Reinhardt
If there’s one Overwatch 2 hero who truly embodies what it means to be a tank, it’s Reinhardt. Sporting a hulking suit of armor and a hammer as big as your house, Reinhardt protects his team with German efficiency, shielding them from any danger that comes their way.
Role: Tank Rocket Hammer A massive, rocket-powered hammer that deals a lot of melee damage. Charge Run straight head, sweeping up enemies in your way and slamming them into the next wall. You can cancel Charge too and steer it slightly – so you can send enemies flying off the map without joining them. Fire Strike Sends a projectile of fire at enemies. Barrier Field Hold the right mouse button to deploy a huge energy shield that blocks all incoming projectiles. The shield has a very large health pool. Earthshatter Smash the ground in front of you dealing massive damage and knocking enemies back in a frontal cone.
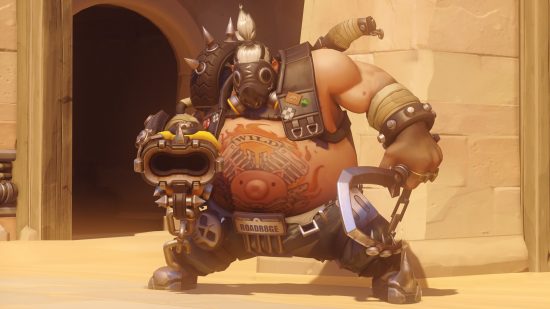
Roadhog
Overwatch 2’s hook hero, a good Roadhog can be nightmarish for DPS characters trying to zip into the action, and excels at plucking poorly-positioned supports out of the enemy backline. Beware Roadhog’s two-piece combo, as he’ll make a quick meal of you if you’re caught.
Role: Tank Scrap Gun A shotgun that shoots scrap metal – very high spread. Alt-fire launches a ball of scrap that explodes on impact, letting you deal higher damage to far-away enemies. Chain Hook Throw to latch onto an enemy and drag them towards you. Take a Breather Eat some food to heal yourself and reduce how much damage you take. Whole Hog Turns the Scrap Gun into a full-auto death machine with no reload, a higher rate of fire, and a huge knockback effect.
Sigma
What is that melody? It’s the sound of Sigma absolutely battering you with rocks, of course. The gravity-defying tank is one of Overwatch 2’s most satisfying to play, especially when you get that fight-deciding Gavitic Flux off.
Role: Tank Hyperspheres Launch two charges which explode, dealing damage in an area of effect. This deals a huge amount of damage if you can land it consistently. Kinetic Grasp Absorb incoming projectiles and convert them into shields. Accretion Throw a mass of rocks and debris at an enemy, knocking them back and dealing damage. Experimental Barrier Cast a barrier that floats and can be placed very far away. You can recall this if you need to reposition it. Gravitic Flux Change the laws of gravity for your enemies and then slam them back down into the dirt.
Sojourn
The first character introduced in the Overwatch 2 beta, Sojourn’s gameplay revolves around charging up her railgun, before using the alt-fire to unleash a devastating burst of damage. Simple, yet effective.
Role: DPS Railgun A full-auto energy assault rifle that deals hit-scan damage. As you deal damage you effectively store energy to launch a more damaging alt-fire shot. Power Slide Slide across the ground and then cancel to jump through the air. Disruptor Shot Fires an energy bubble, snaring and damaging enemies inside it. Overclock Provides infinite charge for the Railgun’s alt-fire.
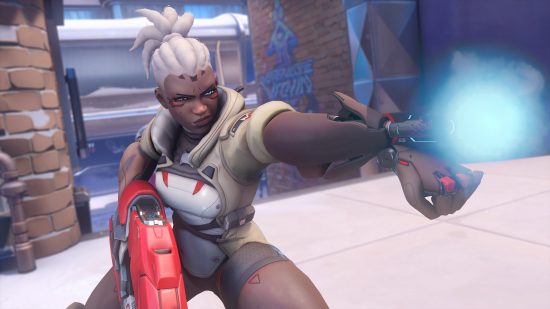
Soldier 76
Captain Call of Duty himself, Soldier 76 is a self-sufficient hitscan hero who can sprint around the map taking down targets, before toggling on his aim hacks (using his ultimate) to ensure no one escapes his vizored vision.
Role: DPS Heavy Pulse Rifle A full-auto assault rifle that deals solid damage. Sprint Hold shift to run faster. Biotic Field A throwable that deploys a healing area of effect for you and your teammates. Helix Rockets Shoot a cluster of rockets that dead moderate damage on impact. Tactical Visor Activates aimbot.
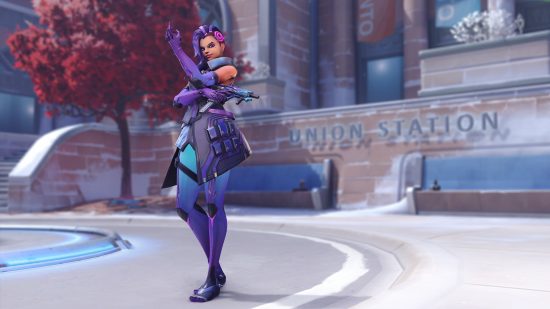
Sombra
Sombra is a master of making herself scarce, utilizing her camouflage to sneak in, unload her damage, and teleport back out. Sombra’s EMP has long been one of the best ults in Overwatch 2, so if you love to dish out DPS up close, you need to try her out.
Role: DPS Machine Pistol Two short-range machine pistols with a high spread. Hack Hold to hack enemies, which stops them from using abilities and marks them for your teammates – even through walls. Hack can also be used on health packs to make them spawn faster and stop enemies from using them. Stealth Become invisible and move faster. You can become detected if you get too close to enemies. Translocator Toss a beacon out that you can then teleport to. EMP Deals 40% of all nearby enemies’ health as damage, hacks them, and destroys barriers. Opportunist You can see hurt enemies through walls and you deal an additional 40% damage towards hacked enemies.
Symmetra
Symmetra is the first of two turret-based heroes, and her sentries can be a huge nuisance due to the slowing beams they fire. While they’re doing their job, Symmetra can create teleporters for herself and her teammates to hop through, making for instantaneous rotations.
Role: DPS Photon Projector Close-range energy beam that does increasing damage. Sentry Turret Place up to three turrets that slow and damage enemies in their range. These effects can stack. Teleporter Create two temporary teleporters for instant map traversal. Photon Barrier Casts a gigantic energy barrier with so much health it’s almost impossible to destroy.
Torbjorn
Speaking of turrets, turret master number two is Torbjorn (who also happens to be Brigitte’s father). This handy mechanic can slap down an auto turret that churns out damage, but don’t let that fool you into thinking he isn’t more than capable of holding his own.
Role: DPS Rivet Gun Essentially a rifle that fires metal bolts. The rate of fire is slow, but it’s highly accurate. The alt-fire is a less accurate, short-range shot. Forge Hammer Hit an enemy to deal damage, or your own turret to repair it. Deploy Turret A self-constructing auto turret that fires at any enemies in sight. Overload Get extra health, improved attack, movement speed, and reload speed. Molten Core Launch pools of molten metal that damage enemies that pass through, and deal extra damage to armor.
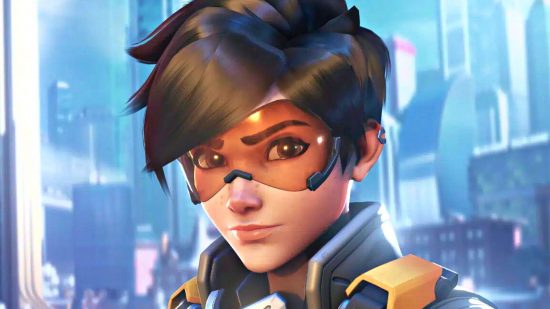
Tracer
Overwatch 2’s poster girl, Tracer is the perfect pick for daredevil players who enjoy the thrill of frenetic, in-your-face combat. Managing Tracer’s blinks is crucial to getting the most out of her kit, though she does have the magical Recall button if you do find yourself out of juice and in a less-than-optimal position.
Role: DPS Pulse Pistols High-spread, short-range auto pistols. Blink An instant teleport in the direction you’re traveling in. Recall Rewind time and go back to your previous location, returning any lost health points in the process. Pulse Bomb Throw a powerful sticky bomb that deals lots of damage.
Venture
Venture’s ability to burrow in and out of the action makes them one slippery character, whether above or below ground. They’re also completely invulnerable to damage while doing their best mole impression, so make sure you’re well-drilled in when to pop up and dive down.
Role: DPS Smart Excavator: Fires a seismic charge that bursts after a short distance. Drill Dash: Venture dashes forward (above or below ground), pushing back enemies hit. Drill Dash’s cooldown is accelerated while underground. Tectonic Shock: Venture sends out damaging shockwaves. Burrow: Burrow underground, becoming invulnerable. Emerge to deal damage. Explorer’s Resolve: Venture’s abilities grant them temporary shields. Clobber: Quick melee attacks deal more damage.
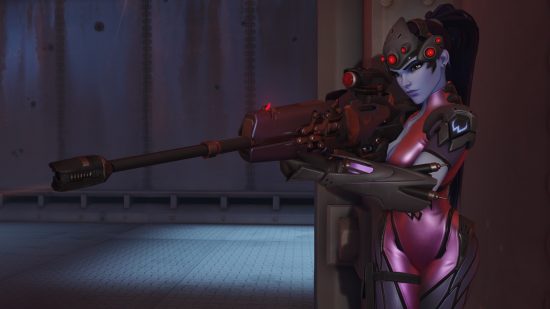
Widowmaker
Sniping is arguably the most satisfying part of any shooter, and Widowmaker’s one-tap potential makes her a go-to for aim monsters. If she finds herself under pressure, Widow can simply grapple out of there.
Role: DPS Widow’s Kiss Standard fire is an assault rifle, alt-fire turns it into a scoper sniper rifle. Grappling Hook Grapple to a ledge. Venom Mine A poison trap that detonates based on proximity, deals damage to affected enemies and marks them so you can track their movement through walls. Infra-Sight This gives your whole team wall hacks.
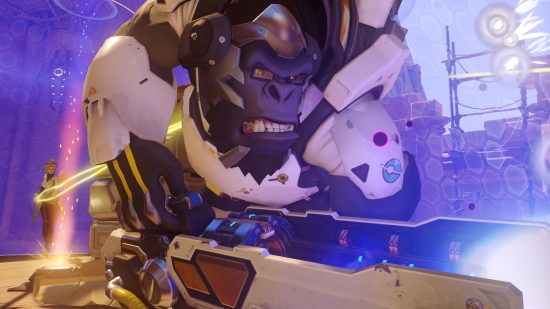
Winston
“Monkey one” is a classic OW2 call for when Winston has dove a bit too far into the enemy backline. Fortunately, the genial ape has a big old barrier and, if necessary, his Primal Rage to keep him safe until reinforcements arrive. That or he punches the stuffing out of the enemy backline. Smiles.
Role: Tank Tesla Cannon Shoots electrical damage in a short-range arc in front of you. You can charge a ranged shot that deals extra damage. Jump Pack Leap through the air, landing on an enemy deals damage to them. Barrier Projector Deploy a huge dome that protects friendlies inside from enemy projectiles. Primal Rage Gain a massive health buff and increase your melee speed, jump cooldown, and damage. Once active Winston can only use melee and jump.
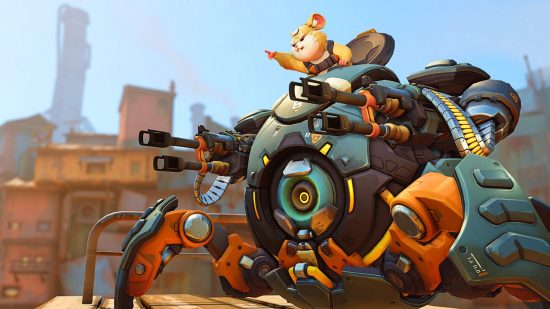
Wrecking Ball
Wrecking Ball is hilariously good fun. After all, what’s more entertaining than rolling around the place as a hamster-controlled robot? He’s also incredibly proficient at disrupting enemy lines with Piledriver and Minefield, so prepare to cause maximum mayhem.
Role: Tank Quad Cannons Four automatic hit-scan cannons dish out moderate damage. Most effective up close. Grappling Claw Transform into a rolling metal ball and launch a grappling hook to act as your anchor. Swing around the anchor point dealing collision damage and knockback to enemies. You can use the Grappling Claw for a quick burst of acceleration, or to get up high. Roll Transform into a metal ball that moves faster. Piledriver When airborne and rolling, use this ability to slam into the ground, knocking enemies into the air and damaging them. Adaptive Shield Temporarily buff your health. The amount of health gained increases if there are more enemies nearby. Minefield Drop a massive cluster of proximity mines that deal high damage.
Zarya
Zarya is one of the only Overwatch 2 heroes who actually wants to get hit, as her barriers soak damage and turn it into more power for her Particle Cannon. Combine Zarya’s Graviton Surge with a Hanzo dragon and you’re pretty much guaranteed a free enemy team wipe… if you land it, of course.
Role: Tank Particle Cannon A short-range beam of damaging energy. Alt-fire launches an orb of damaging energy. Both fire modes are more effective if Zarya has energy charged up. Particle Barrier Create a barrier around yourself that absorbs incoming damage and charges your cannon. This has two charges but shares its charges with the Projected Barrier ability. Projected Barrier Create a barrier around a teammate that absorbs incoming damage and charges your cannon. Graviton Surge Fire a gravity well that sucks all nearby enemies towards it. This is an Ult that works well in combination with damage-dealing Ults.
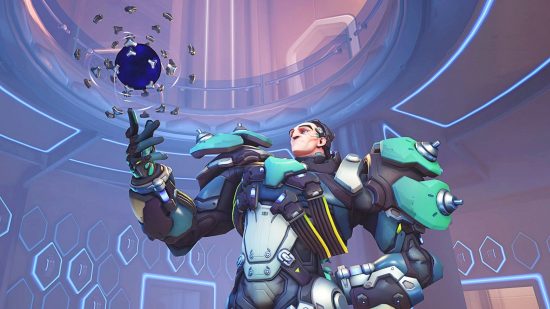
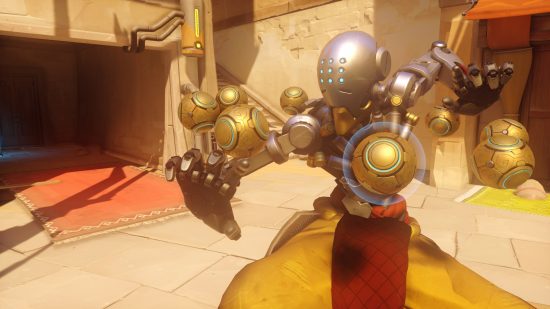
Zenyatta
Moira isn’t the only orb-wielding support OW2 has to offer, and Zenyatta can completely take over a game if piloted properly. Between orb management, hitting your hitscan shots, and coming in with a clutch Transcendence to keep the team alive, it’s well worth putting the time in to learn him.
Role: Support Orb of Destruction Hurl a damage-dealing orb at enemies. Alt-fire is a charge shot that can one-shot some low-health characters. Orb of Discord Attach an orb to an enemy that increases the amount of damage they take. Orb of Harmony Attach an orb to a teammate that heals them. Snap Kick A rapid melee kick that deals damage and massive knockback. Transcendence This Ult creates a huge area of effect that grants healing and faster movement speed to all nearby allies. Zenyatta is invulnerable while using Transcendence.
And there you have it, all the Overwatch 2 characters and what they can do, summed up in one handy guide. You can also read up on all of the Overwatch 2 maps, as well as our thoughts on the current Overwatch 2 tier list based on our experience with the game.